CMOS Eisley – CD4049 Tremolo – Schematic
After much delay (but no echo), I present a meager contribution to the world of DIY effects pedals: the CMOS Eisley CD4049 Tremolo. It uses a single CD4049 IC for both audio path and low frequency oscillator (LFO), yet remains tick-free (a frequent problem when sharing audio and LFO on a single chip). It’s got Speed, Depth, and Volume controls, and uses 5 of the 6 inverter gates in the CD4049. The schematic shows a vactrol, but you can use an LDR + LED in a discreet setup and it should work just fine (as long as the LDR can get to around 1M max dark resistance).
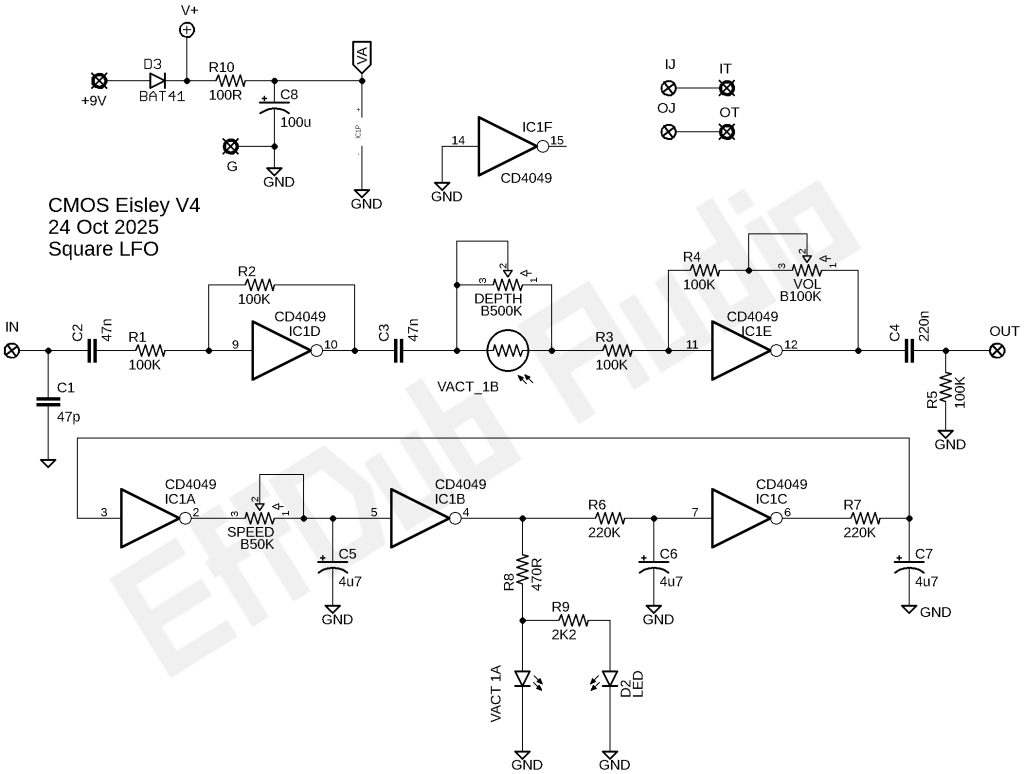
This version is square-wave only. I tried several options for also offering triangle wave option, but couldn’t get them both to place nice in one LFO. If you want a smoother (but never really totally smooth) waveform, add a very large cap (at least 2200uF) between the junction or R8 / R9 and ground. This will impact the overall speed range of the LFO, so you’ll also need to somewhat adjust some of the other passives to get speeds that are all in a usable range again.
The spare inverter could probably be used to buffer the vactrol’s LED. It doesn’t really need it, but it would be an interesting exercise to add it, and would likely make the triangle wave option more stable.
The idea came from stumbling on to an old article about using CMOS inverters to build oscillators. And since I had long known they could also be used for audio amplification, I figured maybe a tremolo would work. And it does, much to my surprise.
Frankly, this is far more of a “hey, I wonder if this will work” than it is a truly useful circuit. There are better tremolos out there with only slightly higher part counts (such as the Shoot the Moon, by yours truly). But, it does it’s job well as a square-wave tremolo, and as far as I know there’s nothing out there quite like it in terms of circuit topology. Give it a go on breadboard and see for yourself. It’s not too bad as a breadboard build.